Hey! By the way… TheEdibleTerrace is reader-supported. When you buy through links on our site, we may earn an affiliate commission and as an Amazon affiliate, we earn from qualifying purchases. Thanks in advance for your support!
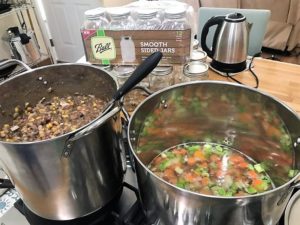
April 2020 Update: We’re in unusual times friends. I can’t pretend to understand it. But I can tell you I am preparing as much as humanly possible for it! And preserving food is a really smart step toward that planning. K and I bought a ton of fresh (and frozen produce) at the local grocery store and have begun making and canning as much soup as possible (we’re big soup eaters). I have adult onset asthma and K is one of those guys who picks up every cold and sinus infection that comes his way – so wearestayinghome as much as possible!
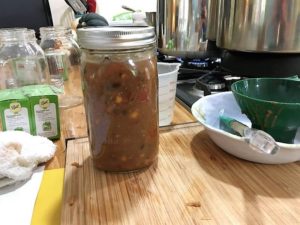
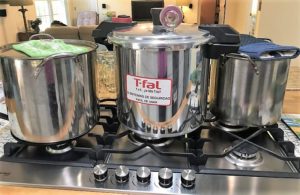
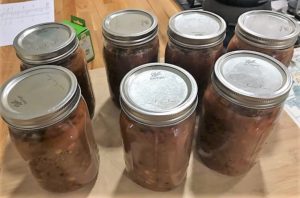
Last weekend, we used our new [easyazon_link identifier=”B01KWZEERC” locale=”US” tag=”edibleterrace-20″]Tfal Pressure Canner[/easyazon_link] to can 7 quarts of vegetable bean soup. (We also froze 12 cups of the soup too.) Next up will be split pea soup!
**Don’t judge the house or the pictures please. The house is a total work in progress and I have never claimed to be a photographer!
Are you interested in preserving your garden harvest? Or maybe you got a great deal on the bulk strawberries you just bought from the farmer’s market? It is totally possible. Canning is an art which has been around since the early 1800’s. It went out of fashion after World War II as the industrial age took off. However, the recession of 2008 started a renewed enthusiasm for home food preservation and it has not slowed down. We all want to get back to our roots-and this is a great way to do it!
Are you not sure if canning is the right method for your particular food? Make that decision here!
[easyazon_link identifier=”B002KHN602″ locale=”US” tag=”edibleterrace-20″]Canning Food For Beginners[/easyazon_link]
[easyazon_infoblock align=”right” identifier=”B01KWZEERC” locale=”US” tag=”edibleterrace-20″]Canning at first glance sounds like one of the scariest ways to preserve food. With freezing, you toss food in freezer bags and store them in your deep freezer. With dehydrating, you stick it in a machine that slowly dries it out. With canning though, you need a canner, canning jars and there’s always the possibility that jars explode. Honestly though, canning isn’t as scary as it sounds. Buy quality glass jars, follow directions to a “T”, and you’ll be just fine.
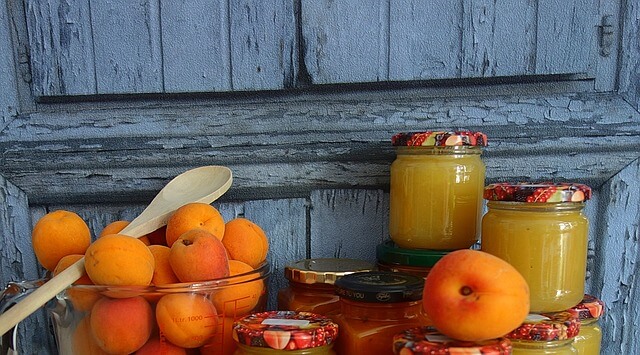
A fun place to start is by making jelly or jam. Pick your favorite fruit, find a jam or jelly recipe and give it a try. You need some half pint glass jars and tongs that will allow you to grab hot jars out of boiling water. Dig around and see if you have a pot large enough to hold the jars and get started. Follow the recipes and directions and you’ll do fine. Any jars that don’t seal properly should go in the fridge and be used right away.
Another great place to start is to with a simple vegetable canning project. Canning green beans is very simple and you can use the beans throughout the year in any dishes you’d use store-bought canned beans. Clean, cut, and blanch your green beans to get them ready for canning.
Then follow the canning instructions below to make sure you cook them long enough and get them to a high enough temperature to kill any bacteria and create a good seal. As with any type of canned good, you should store jars that didn’t completely seal in the fridge and use them within a couple of days.
Another great option is pickles. If you have a bunch of cucumbers growing in the garden, or want to try your hand at some sort of other pickled vegetable (like cauliflower, peppers, or okra for example), give canned pickles a try. The vinegar solution already does a great job preserving the food. Canning adds even more time and allows you to store vegetable that would otherwise go bad quickly.
Stay away from canning meats or high acid produce like tomatoes in the beginning of your canning career. These can be a little trickier to can successfully. Get a few batches of canning under your belt, and invest in some good canning gear (including thermometers and proper canning pots before giving these types of canned goods a try.
Basics of Canning Food
Fun, yes?!? Let’s start with the equipment you need for canning your fruits and vegetables.
You can get a [easyazon_link identifier=”0778801314″ locale=”US” tag=”edibleterrace-20″]complete guide for home canning[/easyazon_link] written by Ball on Amazon. Since it is a book, Amazon has the best price. I highly recommend it. This is truly the only book you will need.
Home Food Canning Equipment
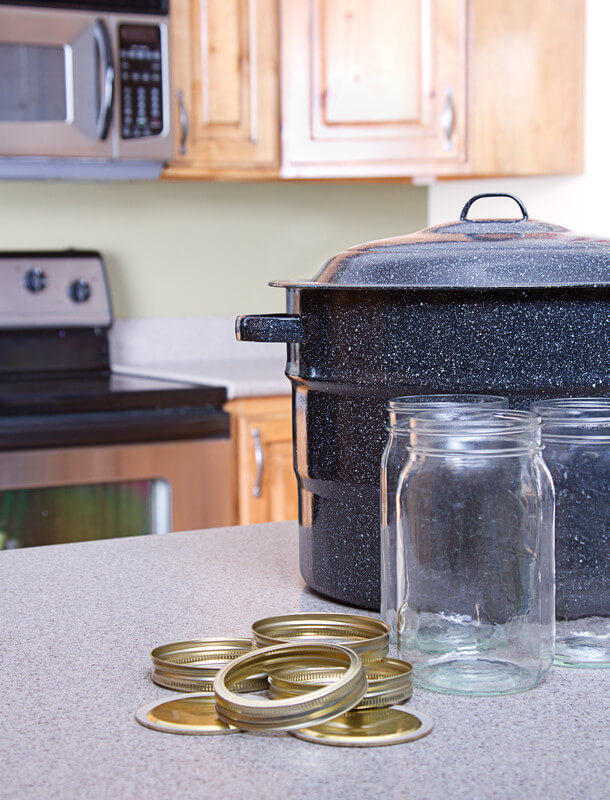
Glass Canning or Mason Jars – [easyazon_link identifier=”B071KTNCSC” locale=”US” tag=”edibleterrace-20″]Mason Jars[/easyazon_link] are the only containers recommended for canning. This is because their neck has a thread that is uniquely designed for the lids and screw bands. Make sure you do not use any jars with chips. The sealing process could be compromised which may cause harmful bacteria to grow in your preserved food.
* Make sure the jars you buy are made specifically for canning and the neck fits the two-piece jar lid mentioned next.
Jar Lids – Canning jar lids are actually two pieces. You have the screw band and a flat metal lid with a seal on the underside. Both pieces are specifically designed with food safe coatings and meant for canning.
Pressure Canner or Boiling Water Canner – You have two choices here depending what you want to can. A [easyazon_link identifier=”B0001UZL8A” locale=”US” tag=”edibleterrace-20″]Boiling Water Canner[/easyazon_link] is in essence just a kitchen pot that is deep enough to double as your boiler. You can buy one specifically for canning but check your cabinets first. You might be surprised at what you have that will work.
You want a pot that will be tall enough to completely immerse your jars with at least 3 inches to spare. This is because you want 1” of water covering your jars and 2-3” of space for the boiling water.
The Pressure Canner, in essence, serves a larger purpose. Unlike the Boiling Water Canner, which can only heat water to 212ºF/100ºC, a pressure canner heats the water to 240ºF/116ºC.
Check out all the Canning Supplies on Amazon.
[easyazon_infoblock align=”right” identifier=”B004QEAQ4G” locale=”US” tag=”edibleterrace-20″]Why does this matter? It is recommended that low acid foods such as asparagus, corn and green beans process at that higher heat to ensure dangerous microorganisms are destroyed.
Along your journey, you will meet some die-hards who swear they can all their food with a Boiling Water Canner and they have not had any problems. The studies are out there though proving that lower temperatures do not kill toxin producing bacterial spores. I am of the mind that I’d rather be safe than sorry. The money you spend at the doctors from one food poisoning event could have paid for that pressure canner!
Jar Rack – This is needed to keep the jars from being in direct contact with the bottom of the pot-and the heat. There are [easyazon_link identifier=”B0039PMJW0″ locale=”US” tag=”edibleterrace-20″]racks specifically designed for canning[/easyazon_link] which have handles that hook over the side of the pot.
* Small warning. Do not ever try to take the rack out of the pot while it has jars in it!
A cake cooling rack can also be used if it fits flat in the bottom of the pan.
Jar Lifter – These are basically a [easyazon_link identifier=”B004QEAQ4G” locale=”US” tag=”edibleterrace-20″]set of plastic coated tongs[/easyazon_link] that will help you pull your jars out of the water without you running the risk of burning yourself. I don’t recommend you use your kitchen metal tongs. Not only will these scratch your glass but they’re also not strong enough to securely pull the jar out of the water.
Optional Supplies
[easyazon_infoblock align=”right” identifier=”B001NNJ42I” locale=”US” tag=”edibleterrace-20″]
Canning Funnel – These funnels have a wide mouth and make it easier for you to fill your jars.
Magnetic Lid Lifter – This plastic “stick” with a magnet on the end makes it easier for you to pull newly boiled lids out of the water.
Bubble Remover Tool – This tool helps you remove the trapped bubbles from your jars. A silicone spatula will also work.
Note to Self: Always use nonmetallic utensils for canning. The metal might damage your jar without you even realizing.
Steps for Canning Food
Print out my 4 Page Ultimate Canning Cheat Sheet Here
In reality, you will follow a specific recipe for most of the items you preserve. i.e. Strawberry preserves versus pears in syrup versus pickled beets. So, I am just going to give you the high level view of what is done to preserve foods in a boiling water canner so you understand the general process. Then, you can choose which food you want to start with first!
Overview of Canning High-Acid Foods in a Boiling Water Canner
- First, have all supplies prepped and ready before you begin. Wash jars and lids in hot soapy water. Rinse and drain thoroughly. Don’t worry about drying them.
- Put as many empty jars as will fit into the boiling water canner, fill with water, put the lid on and turn on medium heat. You don’t need to boil the jars. You just want the water to get to 180F/82C. Keep the jars hot until you’re ready to use them.
- In a small saucepan, heat the water on medium to 180F and place only the flat part of the canning lids into the pan. Keep them hot until you’re ready to use them. * The screw bands do not need to be heated.
- Prepare your food. If it will take longer than 30 minutes to make, wait until the food is cooking before you start boiling the jars and lids.
- Once your food is ready to can, take one jar out of the canner and pour the water back into it. Put the jar on a heat protected surface such as a wooden cutting board. There are also heat proof trays available if you prefer. This is actually a really important step because if you put the jars on a surface that is too cold they can crack.
- Fill the jars with your prepared food. You will need to leave at least ½ inch of space at the top of the jar (called headspace). This space varies depending on which food you are filling. For example, fruit juice only needs ¼ inch of headspace.
- Gently press your nonmetallic spatula or bubble remover into and out of the jar two to three times to release the bubbles. If needed, add more food to the jar. Do not neglect this step. Removing the air bubbles ensures the lids seal properly and your food retains its quality.
- If necessary, wipe the jar rim and threads with a clean damp cloth.
- Lift one of the flat lids out of the saucepan and place on the jar centering the sealing ring over the rim of the jar. Then screw on one of the screw bands. Screw as tight as your fingertips will allow. Don’t use a tool to do this. You don’t want it to be too tight.
- Put the jar back into the boiling water canner.
- Repeat the previous steps until you have all jars filled. Then fill the boiler pot up until there is 1 inch of water covering the jars. Cover the canner with a lid and bring to a full boil. Once the water is continuously boiling, start the countdown based on the recommended time in the recipe.
- After the time is up, turn off the stove and remove the canner lid. Let it sit for approx. 5 minutes. This is actually a really important step to the canning process so don’t be in a hurry. You’re almost done. This might be a good time to refill your wine glass!
- After your five minutes is up, remove the jars from the pot with your tongs. Do NOT let them tilt! Also, do not worry about any water that stays on the lid for now. It will evaporate. Oh, and do not dry the lids. You might mess up your seal.
- Put the jars on a towel in a draft free spot for 24 hours. If you’re concerned about a draft, drape a towel over them.Look at that.
You’re done! Congratulations!!
Well, almost. After 24 hours, remove the screw bands and press down on the center of the lid. If it is concave, you know it sealed properly. If you’re not sure grasp the edges of the lid with one hand, put your other hand under the jar and lift up. If the seal is strong, it will stay firmly attached.
If you do not feel the jar sealed properly, either refrigerate it or immediately go through the process of resealing it again. FYI, reprocessing it may compromise the taste.
Additional Tips
Always put hot food in a jar that has been preheated. You want to heat these jars in hot water. (A dishwasher can be used assuming you fill them while still hot.) NEVER heat them in an oven. No Bueno.
Flat canning lids can only be used once. The protective coating is permanently shaped by its first vacuum seal thus will not seal tightly to any subsequent jars.
Conclusion
I acknowledge this is a little time consuming and complicated. However, think of the gift you are giving your family by removing all those artificial preservatives and questionable chemicals from your bodies! And, I looove that by doing this we are taking back control from the food companies who want to dictate the food they sell us! Canning food for beginners is entirely attainable. Let’s get started, shall we?
Print out my 4 Page Ultimate Canning Cheat Sheet Here
Check Out My Other Food Preservation Articles
Canning Instructions For Beginners: The Ultimate Cheat Sheet [Printable]
Everything You Ever Wanted to Know About Food Processing Preservation Methods
Eating Healthy Year Round With Traditional Food Processing Preservation Methods
The Benefits Of Pickling Food From Your Garden
The Best Way To Store Fruits & Vegetables So They Will Last Longer
How To Decide What To Can, What To Freeze And What To Dehydrate
The Best Way To Preserve Fresh Fruit Is By Making Jelly and Jam
Dehydrating Food Tips – What You Need to Know
Can I Freeze Fresh Vegetables And Fruit? Yes You Can!
Where To Find Great Deals On Produce To Preserve
Five Common Methods of Processing & Preserving Food
5 Pinteresting People Teach Us How To Harvest and Dry Herbs

I don’t have a garden, but this post breaks down the process of canning into simple steps. My nephew’s fiancee is GREAT at this! One of my favorite foods she cans is zucchini relish!