Hey! By the way… TheEdibleTerrace is reader-supported. When you buy through links on our site, we may earn an affiliate commission and as an Amazon affiliate, we earn from qualifying purchases. Thanks in advance for your support!
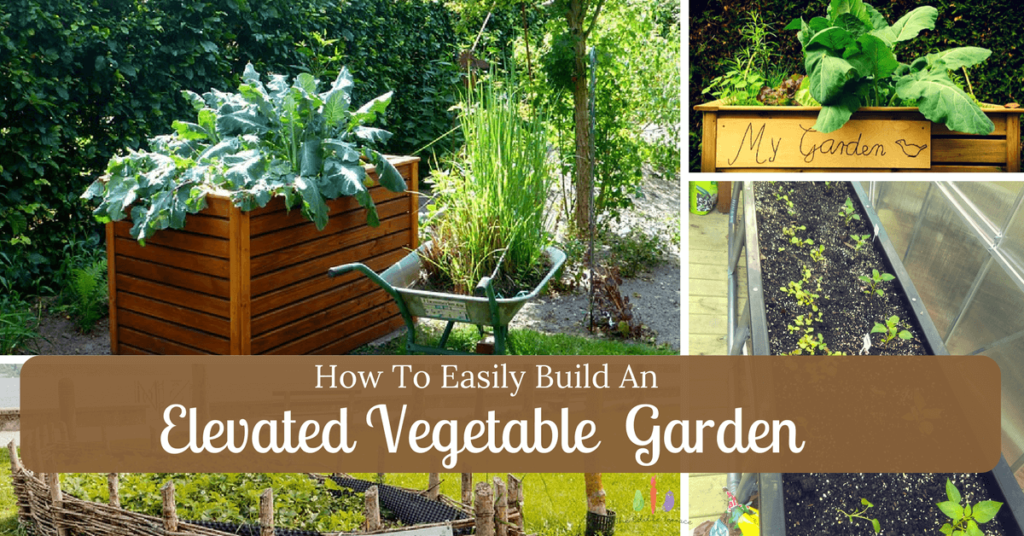
Ah. Productive gardening AND with less back pain. It’s a beautiful idea isn’t it? When you build an elevated vegetable garden of your own, you get to do that and even have fewer weeds to deal with. It is a creative method that gives you full gardening reign for creating garden beds of various shapes and sizes. With the following ideas, you will be growing your very own harvest in no time!
[easyazon_infoblock align=”right” identifier=”B008DUZ3HY” locale=”US” tag=”edibleterrace-20″]Particularly for areas with poor drainage or soil, the raised bed can provide a consistently healthy home for your plants as drainage and soil maintenance is reduced. Many times as you walk through a traditional garden bed, the pressure will lead to soil compacting over time further reducing drainage qualities of the soil. When the bed is raised, the soil stays healthy as it will be less prone for invasion by us humans.
A raised garden makes the most use of your space and has many advantages to your gardening experience. Here are some of the advantages of a raised garden.
- Because of the mixture of a compost and soil blend, your plants will receive more nutrients and thus will grow better.
- The raised garden will have better drainage of the beds. There is less water collection.
- You have a lot of flexibility in how and what you plant.
- The best feature of a raised bed is perhaps the fact that you do not need to bend so much as you weed, plant or harvest your crops.
[toc]
How to Make a Raised Bed for a Vegetable Garden
Choosing a site for your garden
When choosing a site for your garden, in most cases, you ought to work with a North/South orientation. This means that you leave the beds open to the morning sun as well as the afternoon sun maximizing the sunlight that your plants receive.
After this, consider a site that is close to the kitchen for an obvious reason. If you have ever had to run out in the rain and through thick mushy mud to get an urgent bell pepper you would understand exactly why your vegetable garden should be situated as close to the house as possible!
[easyazon_infoblock align=”right” identifier=”B0042AIYH0″ locale=”US” tag=”edibleterrace-20″]There have been many a day when I have made one of my experimental meals and realized how desperately it needed an infusion of fresh herbs. Having those right outside my back door is incredibly convenient!
Consider a space that is out of the shade of trees and other buildings. In reality, most vegetables need from 6-8 hours of sun each day. You would also not want each falling leaf or flower from shedding plants to fall on your vegetable garden (although I have fallen leaves e.v.e.r.y.w.h.e.r.e!).
If you’re going to build your raised garden directly on the ground, choose an area that is as level as possible. This will reduce your work in ground preparation as you would first need to fill in the uneven ground before laying out the raised bed.
If you will have several beds, try aligning them in a row to make it easier if you decide to install irrigation systems. * It is actually beneficial to create a couple beds so you can rotate crops.
As you lay out the beds, leave enough space to walk through and perhaps push a wheelbarrow along. That space will also come in handy when weeding and harvesting as you can easily work around your beds.
How Do You Build a Raised Garden Bed
Preparing the area
Now that you have decided on the area in which you will put your raised garden, it is time to start preparing it.
I mentioned earlier that you should choose a level ground. On the ground, try and get rid of all the weeds, dead turf and dirt clods on the ground. This is particularly important for enabling you to make straight and well-shaped outlines of your beds.
Use chalk or a long string to demarcate the outline of the bed. Mostly the beds should range from 3ft to 6ft wide. Length is purely up to you and the space you have. Those dimensions make up for an ideal size because though narrow enough to enable easy movement around them when working, you also get the opportunity to plant even those vegetables that use up a lot of space. i.e. Looking at YOU watermelon and squash!
The height of the garden is purely up to you too. Think about the soil you will need to fill it all the way up and the frame required to hold it in place.
For areas that retain a lot of water, dig down a few inches and fill up the bottom with rock debris or gravel particles. This will help with drainage when you water your plants.
Now build your walls (more on this below).
With the addition of soil and plants, the walls will get much pressure exerted on them pushing them outward. To lower the chances of this happening, you can place some firm wooden or steel posts on all four sides of the bed to keep them in position.
Fill the bed with the soil mixture to your desired height.
If you can, make a sunshade for your garden to protect it from direct sunlight in the summer and even excessive wind.
Next Steps
There are raised garden bed kits you can buy online like this best selling one from Amazon. You can also find DIY plans online for free (more on this below).
Do you want to know how to build a raised garden bed cheaply? Recycle! Recycle! Recycle!
You actually can use any old material for crafting out your garden. These can be medium sized rocks for a rugged look, bricks, lumber, old blocks, watering troughs, etc. I have attached a picture of the 10’ watering troughs I am using for my own garden below. My master gardener friend actually just dumps a bunch of soil in a spot (no frame at all), shores it up with pine straw and then plants. I would guesstimate they have approx. 1 ft of soil above the ground.
If you plan to use wood, make sure you get non-toxic as most treated lumber is toxic and may permeate the soil to invade your plants. There are some natural types like cedar-wood or redwood that are resistant to rot.
[easyazon_infoblock align=”none” identifier=”B07B3ZYC51″ locale=”US” tag=”edibleterrace-20″]
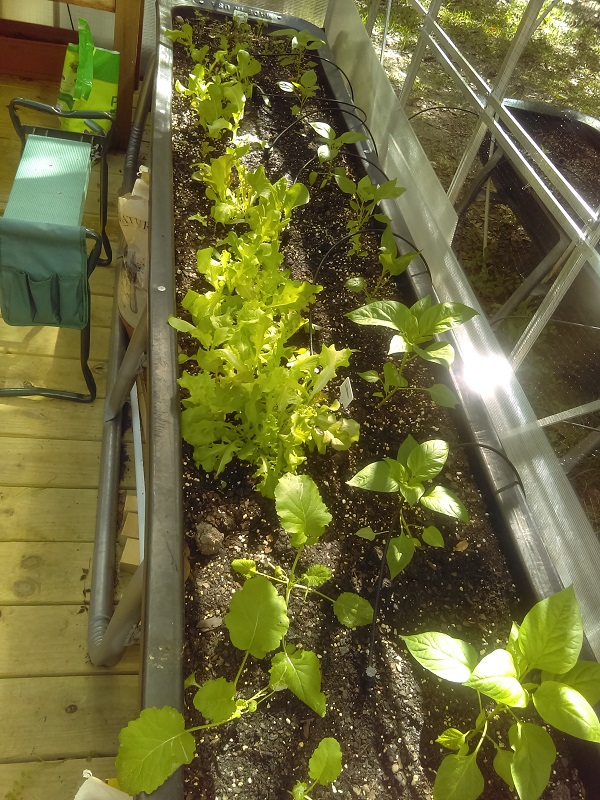
Our 10′ feed trough with spring seedlings in it.
If using steel, go for the galvanized versions as well as stainless bolts and screws to minimize rusting and plant toxins. Once your steel beds installed, then soak them with water and some manure for a couple of days before planting any of your seeds.
Besides my two 10ft watering troughs, I also have a Gronomics raised garden bed as well as several random pots growing herbs and veggies set in various places I can fit them.
[easyazon_infoblock align=”none” identifier=”B006MRE5MO” locale=”US” tag=”edibleterrace-20″]
Free Online Raised Garden Bed Plans
- http://thefoodproject.org/sites/default/files/DIY-bag-manual-2012.pdf
- http://yellawood.com/projects/project-plans/raised-garden-bed.aspx
- http://web.uri.edu/sgi/files/DIY-Pallet-Garden-Instructions.pdf
- Lowes – https://www.lowes.com/projects/gardening-and-outdoor/how-to-build-a-raised-garden-bed/project
Conclusion
When you build an elevated vegetable garden for yourself, you are not only doing your back a favor but also your body and your wallet. Not only do you get the pleasure of growing your own food but you also save your body from a little suffering. 🙂 From here, it all depends on budget, materials you have access to and how handy you are with a toolbox.
[easyazon_infoblock align=”none” identifier=”B01CFDQNTQ” locale=”US” tag=”edibleterrace-20″]
