Hey! By the way… TheEdibleTerrace is reader-supported. When you buy through links on our site, we may earn an affiliate commission and as an Amazon affiliate, we earn from qualifying purchases. Thanks in advance for your support!
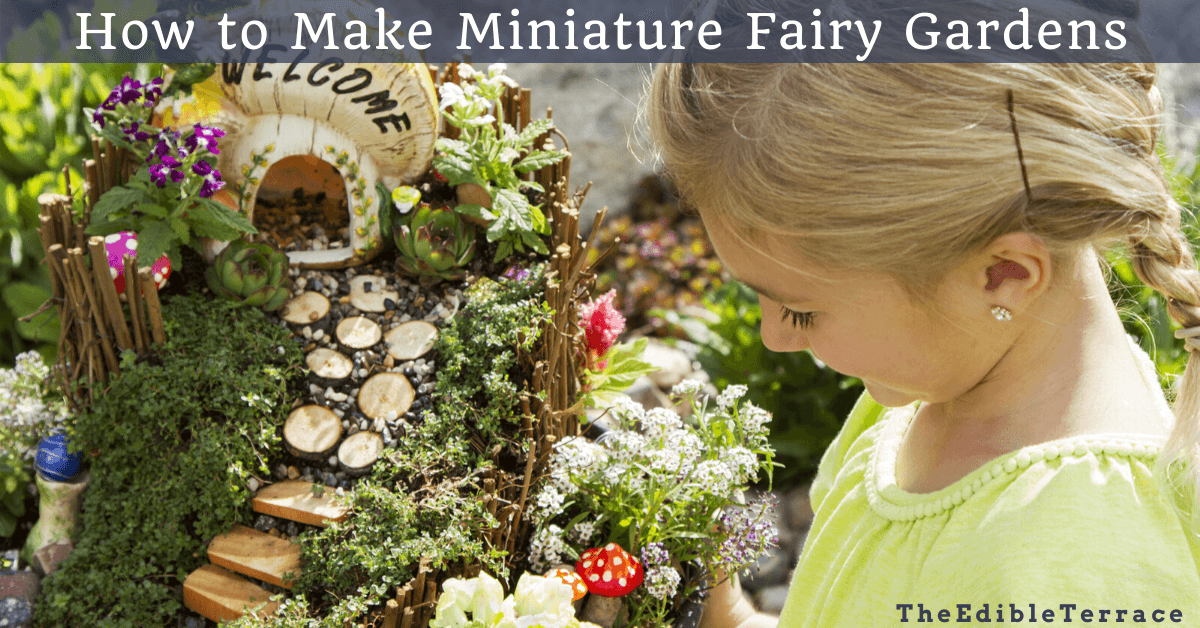
Let your imagination soar by learning how to make miniature fairy gardens! This is a really fun and unique gardening project that is perfect for everyone. They are SO easy to put together, allow you to be as inventive as you want, and will become an engaging family activity. Whether you want to make fairy garden terrariums with your kids this summer, or make a tropical fairy garden for your yard, creating one can be a fun way to spend a weekend!
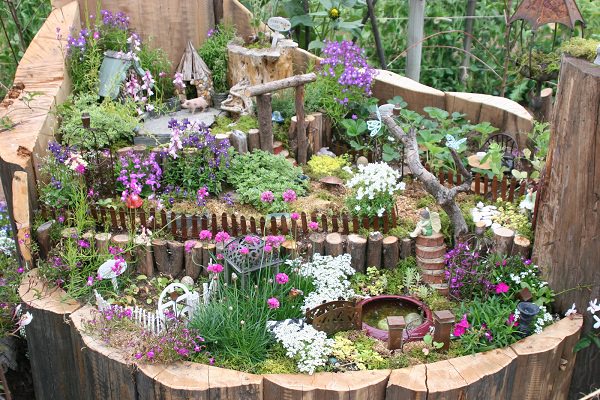
Fairy gardens are exactly what they sound like; miniature gardens with fairy figures, plants, and accents.
The figurines and accents add to the beauty of the real plants and flowers you include in your fairy garden. A fun aspect of these gardens is that you can do as much or as little as you want with them.
From the container you choose, to which fairy figurines you include, this garden can be anything your imagination makes it!
Instructions to Make Miniature Fairy Gardens
Choose a Theme
The first step in figuring out how to make miniature fairy gardens is to choose a theme. You can go with a classic fairy garden theme, or get a little more imaginative. For example, you might have a house by the ocean and want to go with a fairy garden beach theme. This may include small, blue marbles and rocks to create water, real beach sand and seashells, and little fairies with their swimsuits on. The rest is entirely up to you. Some other fairy garden themes include:
- Fairy Farm
- Carnival with Fairies on rides
- County fair
- Enchanted Fairy Forest
- Playground with kid fairies playing
- Backyard Fairy Garden
- Camping in the Forest with Fairies
- Zen
- Woodland Fairy Scene
Fairy Garden Beach Themed Accessories


Selecting the Right Scale for Your Fairy Garden
Choose the right scale for your fairy garden before you buy any accessories. Begin with some aspects of the garden first and measure the rest of the plants and accessories against that scale. For example, if your fairy is 4 inches tall, you might want the house to be a little larger than that. This is an important distinction to make, since miniature houses, flowers, plants, fairy figurines, and furniture come in all sizes.
With these basic tips, you are well on your way to your very first fairy garden!
Choosing Your Container Type
 Now that we have gotten the basics out of the way, we can continue planning our fairy garden. Once you know the theme and scale, it is a lot easier to choose the right container. This is going to be the basis for your entire fairy garden, so it is an important decision to make. It will determine the type of fairy garden you have, how much space you have for accessories and plants, and will even determine the location of your garden. Some good containers to choose from include plant pots, bird baths, tree stumps, and right in the ground. Below is a little more detail about each of these types of containers.
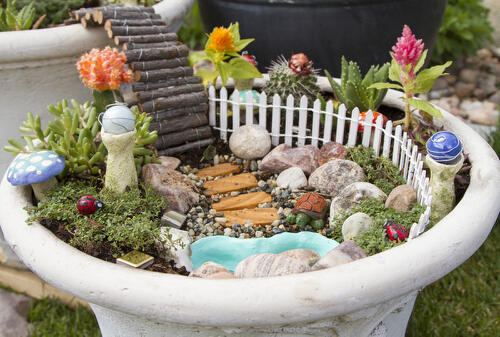
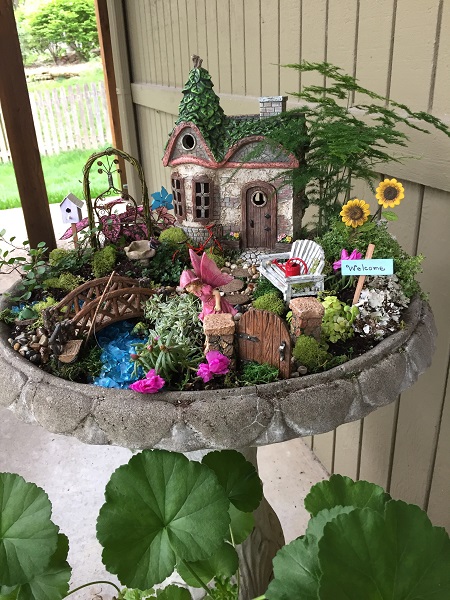
Plant pots One of the best types of containers to use for fairy gardens are planting pots. The world is your oyster where size, shape, or material are concerned. You can get a more traditional appearance by choosing an old clay pot which will add a look of times gone by to the fairy garden. Or if you don’t have one, visit a local garden store or search online for a pot of your choice.
Plant pots are good because they give you as much space as you need for the fairy garden, but also provide holes at the bottom for proper drainage. Consider choosing a clay pot since they tend to last a long time and can handle a lot of weather elements. These are very durable, so you can fill them with soil and plants of your choice without causing too much weight or stress on the pots.
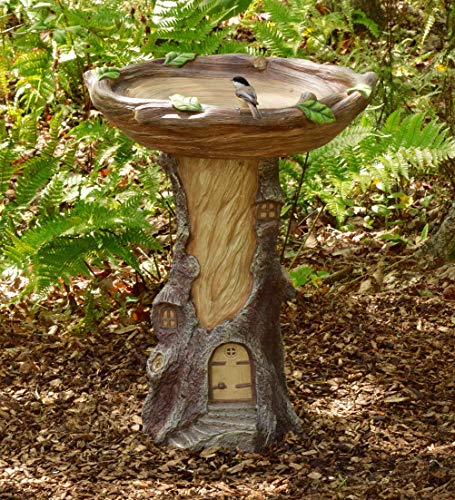 Bird baths A fun creative idea for your fairy garden is to use a bird bath for the garden. This is an ideal choice if you want to put the garden out in the middle of your yard as if in a natural landscape, instead of placing it on your patio or balcony. It will already be standing up, so you don’t need to worry about placing it on a table or tree stump. Bird baths are usually strong enough to handle the weight of soil, plants, and figurines. It also adds a more unique look for your new fairy garden.
Tip: You could probably find an old bird bath at a local thrift store which would not only give it an aged look but also is often an affordable option.
Tree stumps Do you have a tree stump in your backyard that you’re not sure what to do with? Why not turn it into a fairy garden! It will be extra durable since it is still in the ground, and prevents you from having to worry about either grinding the stump or figuring out how to get rid of it in another way. You will need to dig a hole in the center so you can make room for the different plants and accessories you want to include. It will be SO cute too!! Another excellent benefit is that tree stumps tend to be large in diameter, which gives you a lot of space to let the creative juices flow.
Near trees If you want your fairy garden to be on the ground, you can definitely make this happen! Instead of a container, you are actually planting it directly on the soil preferably close to a garden or tree (protects it from the elements). Find a small area of land where you can add your fairies, accessories, plants, and flowers.
* You can also use a shallow container that you put directly on the ground, which may deter pests from finding it.
Selecting the Right Soil and the Best Plants for Fairy Gardens
At this point, you have selected a theme, know what scale you want to work with, and have also chosen the container to use! The next step in making your miniature fairy garden is to select your soil and plants. This should be done before adding your fairies and other accessories as it is going to take up the most space. Once everything is planted, you know how much room is left for your accessories.
Best Practice Tip: Choose a soil with lots of natural organic matter Since you want the fairy garden to look as natural as possible, your soil isn’t just going to be any old generic plant soil. Instead, choose one with a lot of chunky organic matter, as it will look more like what you imagine a real fairy oasis to be. Instead of the typical one color soil, find one with dark and light parts, and plenty of bits of plants and other organic matter. This will not only look natural in the fairy garden, but it will ensure your plants thrive.

- False cypress
- Parlor palm
- Norfolk pine
- English boxwood
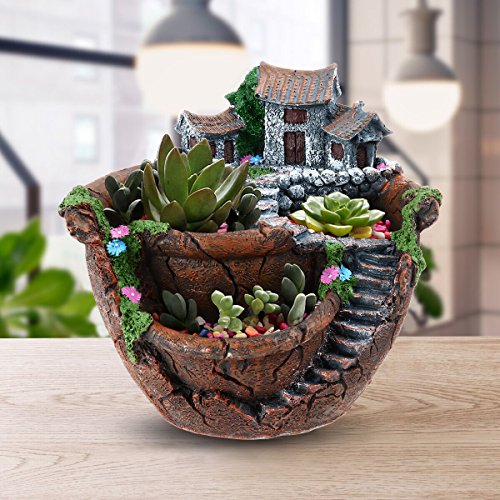
- Small succulents
For outdoor fairy gardens, the following plants and foliage are ideal for the fairy garden:
- Ivy
- Wooly thyme
- Aloe succulents
- Primrose
- Mini roses
- Blue spruce
- Licorice plant
- Oregano
- White star creeper
- Baby’s tears
- Boxwood topiaries
In the end, you really can choose any type of plant you want. Make sure they are easy to care for and will stay small enough to fit in your chosen garden container.
Now Add Your Fairies and Decorations
Now comes the fun part! At this point in your fairy garden project, you want to be finished with planting the plants in your garden space. Now, you can finally add your fairies and decorations! Keeping in mind the garden theme you chose, let your imagination have fun here. Remember, you don’t need a unique theme to have a beautiful fairy garden. A traditional garden is still tons of fun!
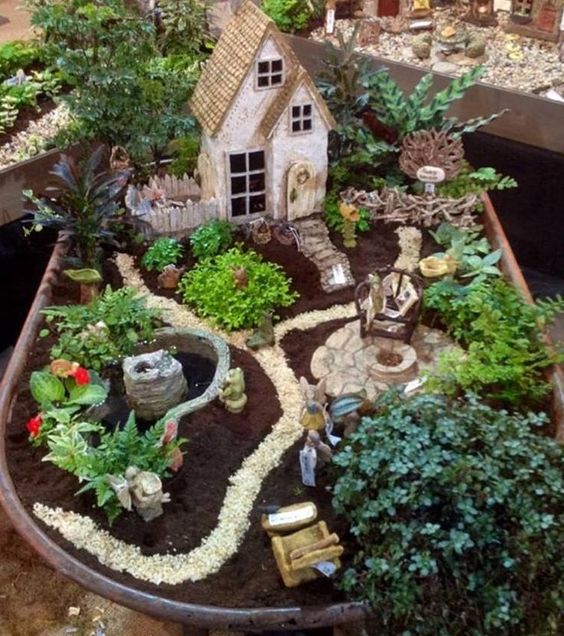
Add the larger accessories first
It is a good idea to start with the larger accessories first, such as your fairy house, the fence around the outside of the garden, or maybe furniture items.
Outdoor picnic furniture, an arbor, or little chairs and table made of twigs would be fun to add too. Try to choose accessories that look like something fairies would make if they were real, not something generic made of wood. If possible, do not to use furniture items for dollhouses. They usually look too perfect and modern. Additionally, you really want it all to be fitting for an outdoor space and environment. Most dollhouse furniture is not created to survive the elements.
 Next add the smaller accessories and decorations Going down in size, you will then add the accessories that are smaller. After the house is in place, you can start to add decorations such as stones scattered around the garden, acorns, or dried flowers and leaves. Little figurines of mushrooms for a traditional fairy garden are incredibly adorable, or little umbrellas if you are going with a beach theme.
A fun idea is to create your own little garden within your larger garden with a small shelf that has small ceramic pots and topiaries. Some items that work really well with fairy gardens include:
- Marbles and stones
- Popsicle sticks
- Twigs
- Dried flowers and leaves
- Dried herbs
- Wire and steel
- Copper
- Gemstones
- Pine needles
- Gravel
- Moss
Put your fairies in last. Your fairies should be the last thing you add. You won’t really know where to place them until the garden, house, furniture, and decorations have found their home. In addition to the fairies, you can also add small woodland creatures, birds, and other friends for the fairies.
Helpful Tips
While you may be more than ready to get your fairy garden started, it helps to know just a little bit more. Here are some easy and helpful tips that will give you the fairy garden you want!
Put the house near the back of your garden. When you first start setting it up with accessories, you will be starting with larger items, such as your fairy house. While it can sometimes be difficult coming up with a good layout, a good rule of thumb is to place the house first. Put it near the center-back of the container to get started with your layout.
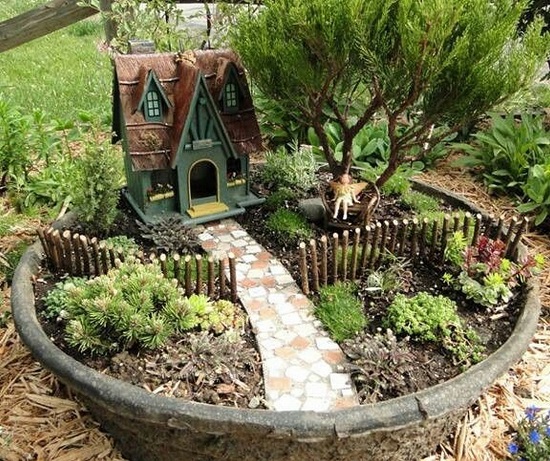
Use pebbles or marbles for paths. Having a path or two in the fairy garden really enhances its realistic appearance. You can make paths with just about any material you find; small flat marbles or pebbles are ideal. Fortunately, you can get them in a lot of different colors, from ocean blue to natural shades like yellow, green and brown.
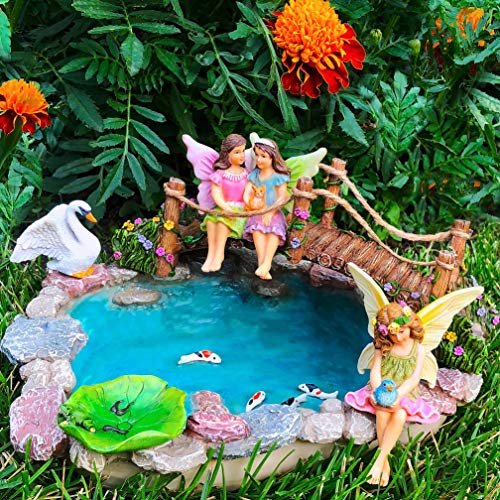
Create a pond. Who doesn’t love ponds?!? You could even have one of your fairy’s standing there overlooking it. Here, you can use any type of blue or green materials you find, from pieces of glass to marbles, stones, and even plastic beads.
Add to the greenery by using moss. In addition to the plants you already have for natural landscape, add to the forest look with some green moss. Take some scissors and cut it into small pieces then scatter it around the garden, such as around the fairy house, in front of plants, or near the fence.
Conclusion
With these easy tips, you will be able to make miniature fairy gardens in abundance. They are wonderful gifts or great activity ideas for your kids this summer. There are also mini fairy garden kits if you’re either not sure where to get the different materials or do not have easy access to them.


Really interesting stuff you have here! I would definitely be using a container with drainage holes if I were doing this; as I have used a bottom gravel layer in the past and it was disappointing. This would be great for people who want to dabble into gardening but have limited space or just want to get more creative with it.
Thanks Jennifer! I also thought these fairy gardens were SO cute and adorable! And, as you say great for those who want to “dabble” in gardening. My opinion is, once you start you’re hooked! I was anyway!!